 Ir directamente al contenido
Wiring the pressure switch is not too difficult but can be confusing. In this article, we will review how the pressure switches can be wired and our best practices for doing so.
CONDUCTOR'S SPECIAL 2-GALLON - WIRING THE PRESSURE SWITCH
OVERVIEW
We will be working with this style pressure switch. If you have our bottle-cap style instead, please see the article here.
GETTING STARTED
At this point, you have likely noticed that the pressure switch has four wires that come out of it. You currently have a red, white, blue, and black wire that comes out of this unit. Each wire has its own purpose and can be broken down into the following list:
Red - +12v Positive power from the battery. This wire will connect to the battery with our in-line fuse holder.
Blue - +12v Positive trigger source. When +12v is supplied to this wire, the pressure switch turns on and the compressor can run. This wire is run to a key-power-on source so that the unit cannot operate when the vehicle is off.
White - This wire gets connected to the red wire coming off the compressor.
Black - Connected to the vehicle frame as a ground connection.
RED + BLUE WIRES
RED WIRES
Red Wire
This wire pulls power from the battery directly and supplies it to the compressor. For this connection, it is ESSENTIAL that you use the supplied red wire with your kit or an equivalent 10awg wire.
PLEASE NOTE: IF YOU NEED TO EXTEND THIS RUN LONGER THAN 20 FEET, WE RECOMMEND USING AN 8AWG WIRE OR LARGER
Start by locating your fuse holder in the baggy containing your electrical components. Our fuse-holder is sent to you in a loop. *Do not install a fuse into the holder yet.
Go ahead and cut the fuse holder in the center to make two ends. You can cut the wire where the dashed line is in the picture above. Using a set of wire strippers, strip each end of the holder and expose the copper leads. Each end should now look like this:
At this point, we will use the supplied ring terminal crimp connector on one side of this fuse holder. The opposite end will accept one of the yellow butt connectors included with the electrical connectors. The two connectors are pictured below.
The ring terminal connector can be used to connect the fuse holder to your positive battery terminal. The yellow butt connector will allow us to connect the fuse holder to the red wire, and complete the connection back to the pressure switch. Go ahead and strip one end of the supplied red wire, and connect it into the opposite end of the yellow butt connector. Route your red wire from the fuse holder back to the pressure switch. Do not cut your red wire until you have finished routing it back to the pressure switch. You want to make sure you don't cut it too short.
Once the red wire has been routed back to the pressure switch, you can cut off any excess wire while still leaving a small amount of slack. Locate the neon green terminal connector in your electrical kit.
This connector will allow you to connect the lead from the battery up to the red wire on the pressure switch. Strip the end of the red wire you intend to use for the pressure switch and crimp this connector onto the wire. At this point, you may connect this terminal to the red wire on the pressure switch. You have completed the connection for the red wire.
BLUE WIRES
This is where most of the confusion happens with a new install. This blue wire on our pressure switch serves as a signal wire for the pressure switch. If no power is present at this wire, the pressure switch will not allow the compressor to run. We typically connect this blue wire up to a key-power-on source on the vehicle so that the compressor can only run when the vehicle is on. If you connect this wire to the battery, the compressor could run overnight and drain your battery.
Start by locating the supplied roll of blue or grey wire (doesn't matter which you use). Included with your terminal connectors is a small connector that looks like this:
Go ahead and strip one end of your grey/blue wire. Crimp this connector onto the stripped end of the wire, and connect this piece into the blue wire on the pressure switch.
From there, you will need to locate a good power source for this wire. This will differ from vehicle to vehicle. You will want to locate an accessory power wire that is only powered when the vehicle is on. If you need help locating a good source we recommend checking google for wiring schematics for your vehicle.
Below is a list of common sources that typically only come on when the key comes on. Tapping into the power wire on any of these sources using the provided red T-tap in the wiring kit, will give you the positive key power on you need for the system to only run when the vehicle is on.
- Radio
- Amplifier (if applicable)
- USB Power Outlet
- Cigarette Lighter
- Daytime Running Lights
- Trailer Lights
- Heated Seat(s)
- Sunroof
- Power Windows
WHITE WIRES
The white wire on your pressure switch is the easiest one to complete other than the ground. Go ahead and connect the white wire directly to the red wire on the compressor. You don't need to do anything else here.
BLACK WIRES
The black wire can be routed over the frame of the vehicle as a ground. We recommend using a wire brush on the desired ground point to remove any paint/finish materials that may inhibit the connection to the metal frame. If you do not remove the paint, your ground may not work properly. The ground must be connected to BARE METAL. You can use a self-tapping 5/16" screw (or similar size) to secure the ground connection. Once connected and secured, we can now test our pressure switch to ensure everything functions as intended.
TESTING THE PRESSURE SWITCH
Locate one of the 35A fuses that came with your electrical connectors. These fuses are pictured below:
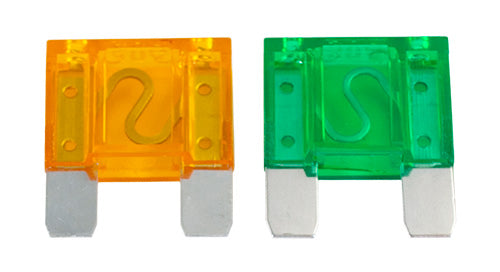
Open up the fuse holder by pulling back on the red cover. You can insert one of these fuses into the holder by simply pressing it into place. There may be some resistance, this is normal. Once the fuse has been inserted, turn the vehicle on and listen for the air compressor. It should start filling your air tank once the vehicle starts. Check out the links below for wiring your horns to the steering wheel or on a separate button.
UP NEXT: CONNECTING THE SHOCKER HORNS TO THE AIR TANK
This guide explains how to connect the Shocker XL Train Horns to the air tank, including proper valve orientation, fitting installation, horn positioning, and air line routing for balanced airflow and optimal sound.